Processes
Advantage Training for Everyone
Tab {.tabset}
How to Log-in to Advantage
- In your web browser, go to https://www.advantagehosted.com
- Click on “Webvantage”. This should take you to the sign-in page for Advantage.
- You’ll be prompted to enter the following information to sign in:
- Database: This will be “TCG” for everyone (The Cornett Group).
- User ID: This will be provided to you from Kris Neuzel, it is usually “230” followed by your first name.
- Password: This password will be provided to you along with your User ID, but can be changed per your preferences.
- Click “Remember Me” if you’d like to avoid entering all of your login information each time.
- Click “Sign in”
After this, you should be logged in and directed to the Advantage homepage.
How to Check Your Schedule
There are three ways to check your schedule in Advantage.
- Card view – No
- Calendar view – Also no
- My Assignments & Alerts – YES!
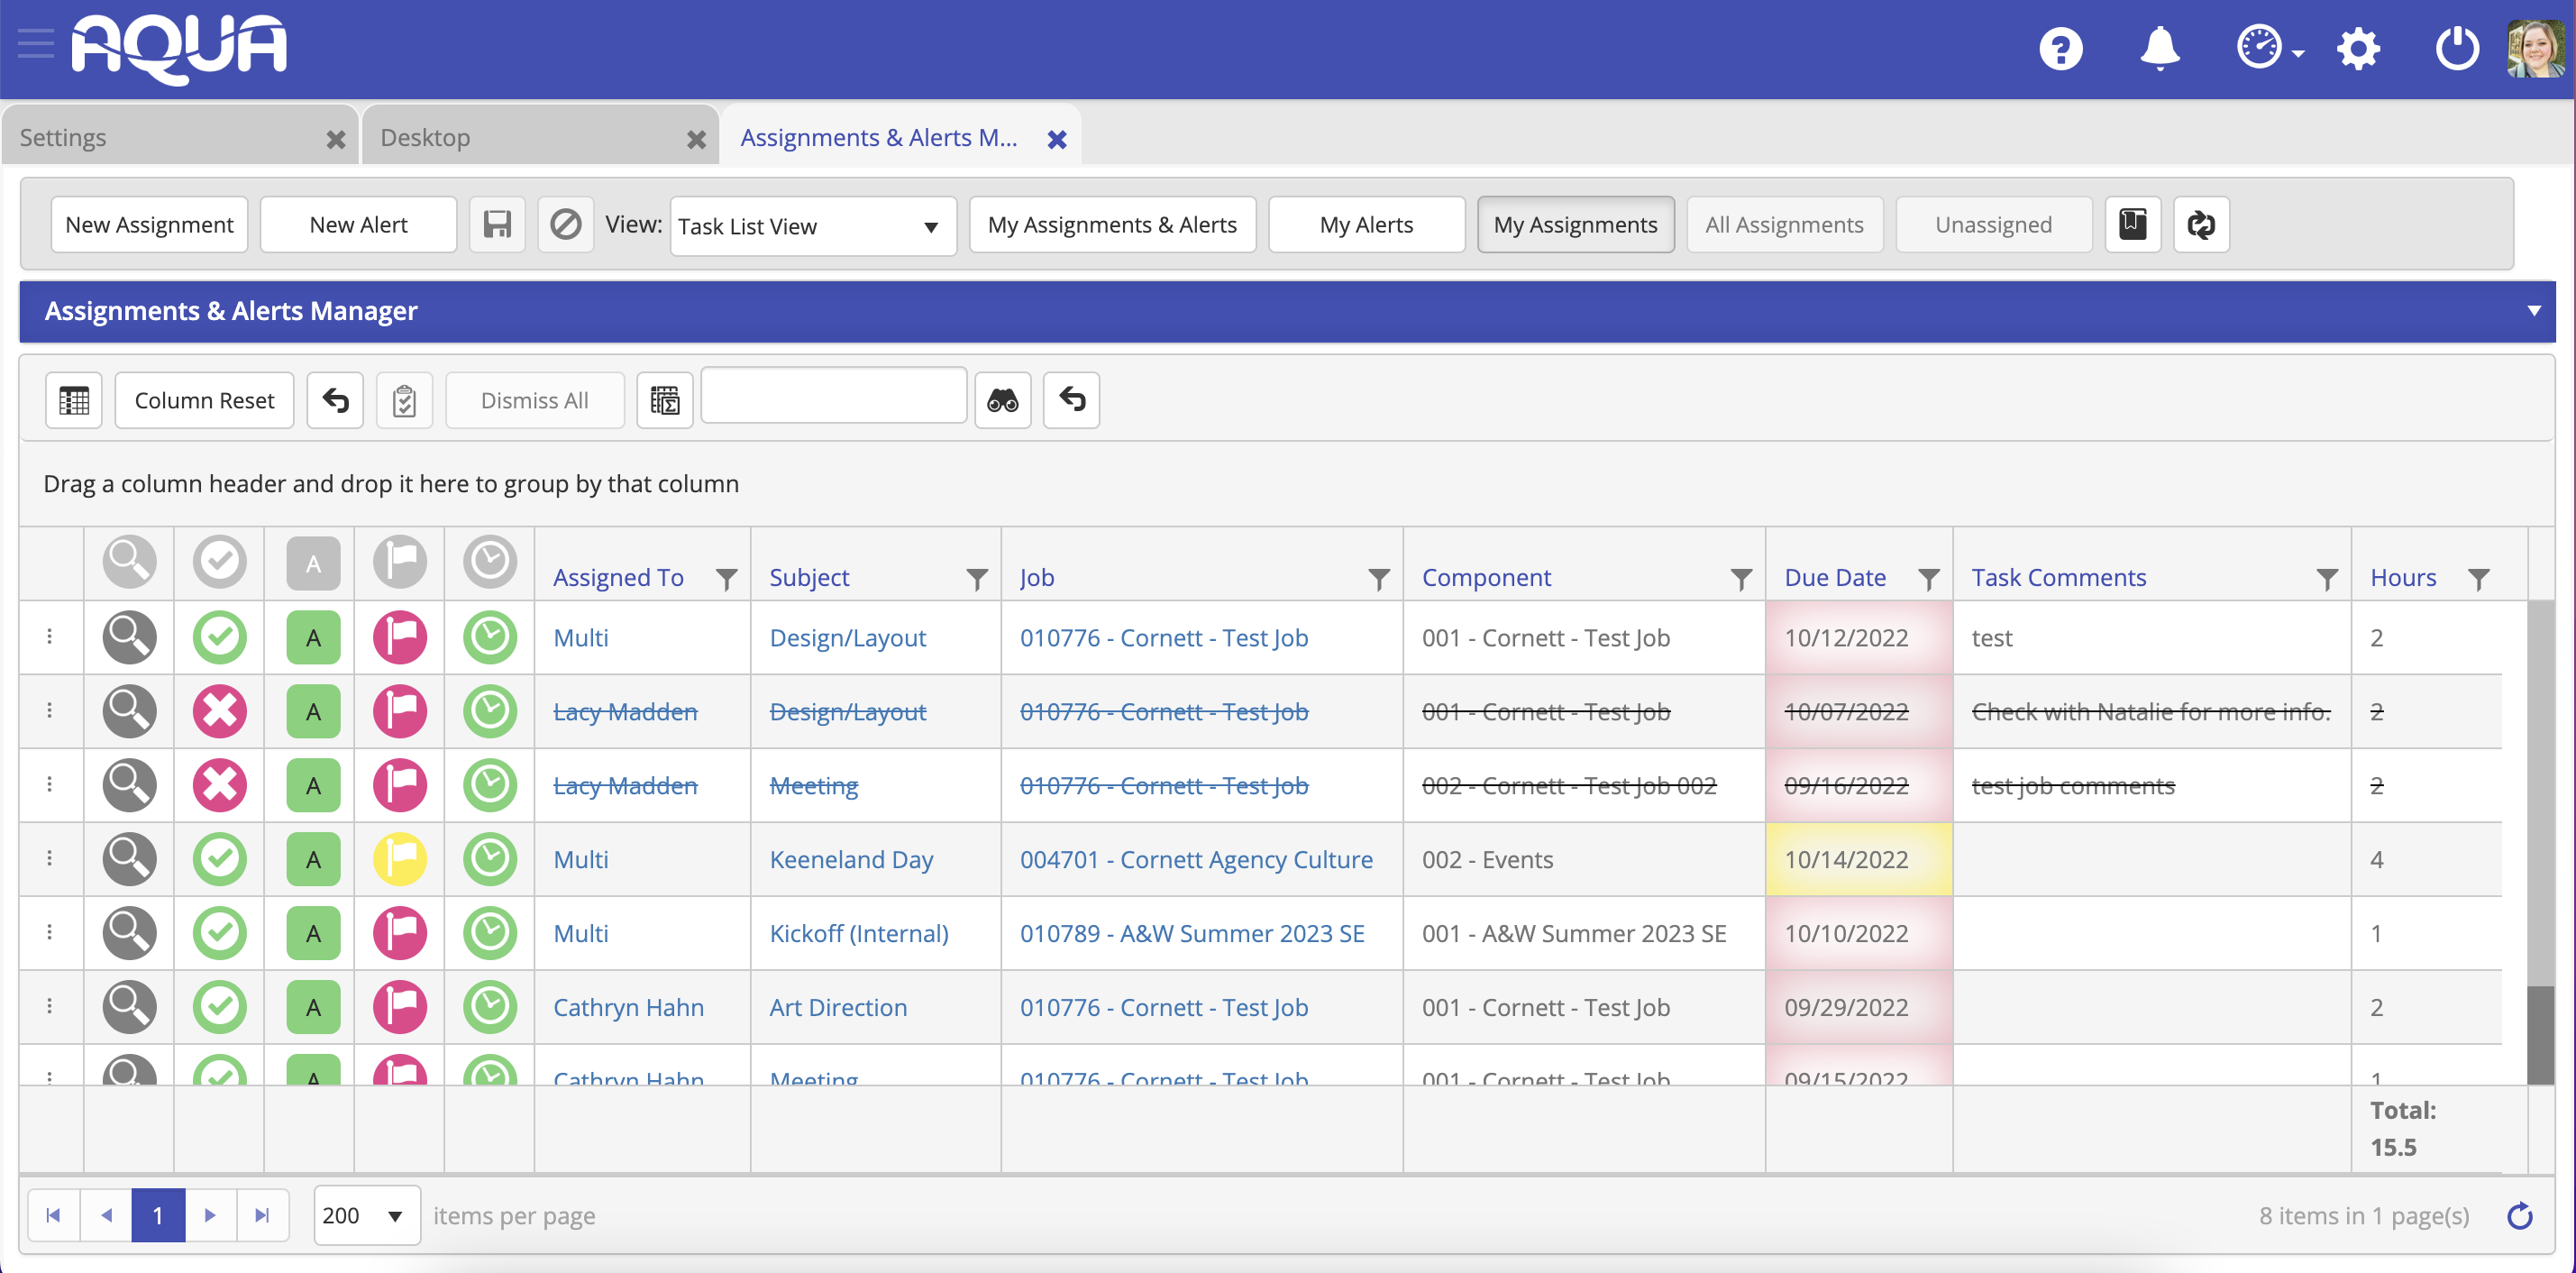
Using My Assignments & Alerts
At Cornett, we prefer our team to use the My Assignments & Alerts tool.
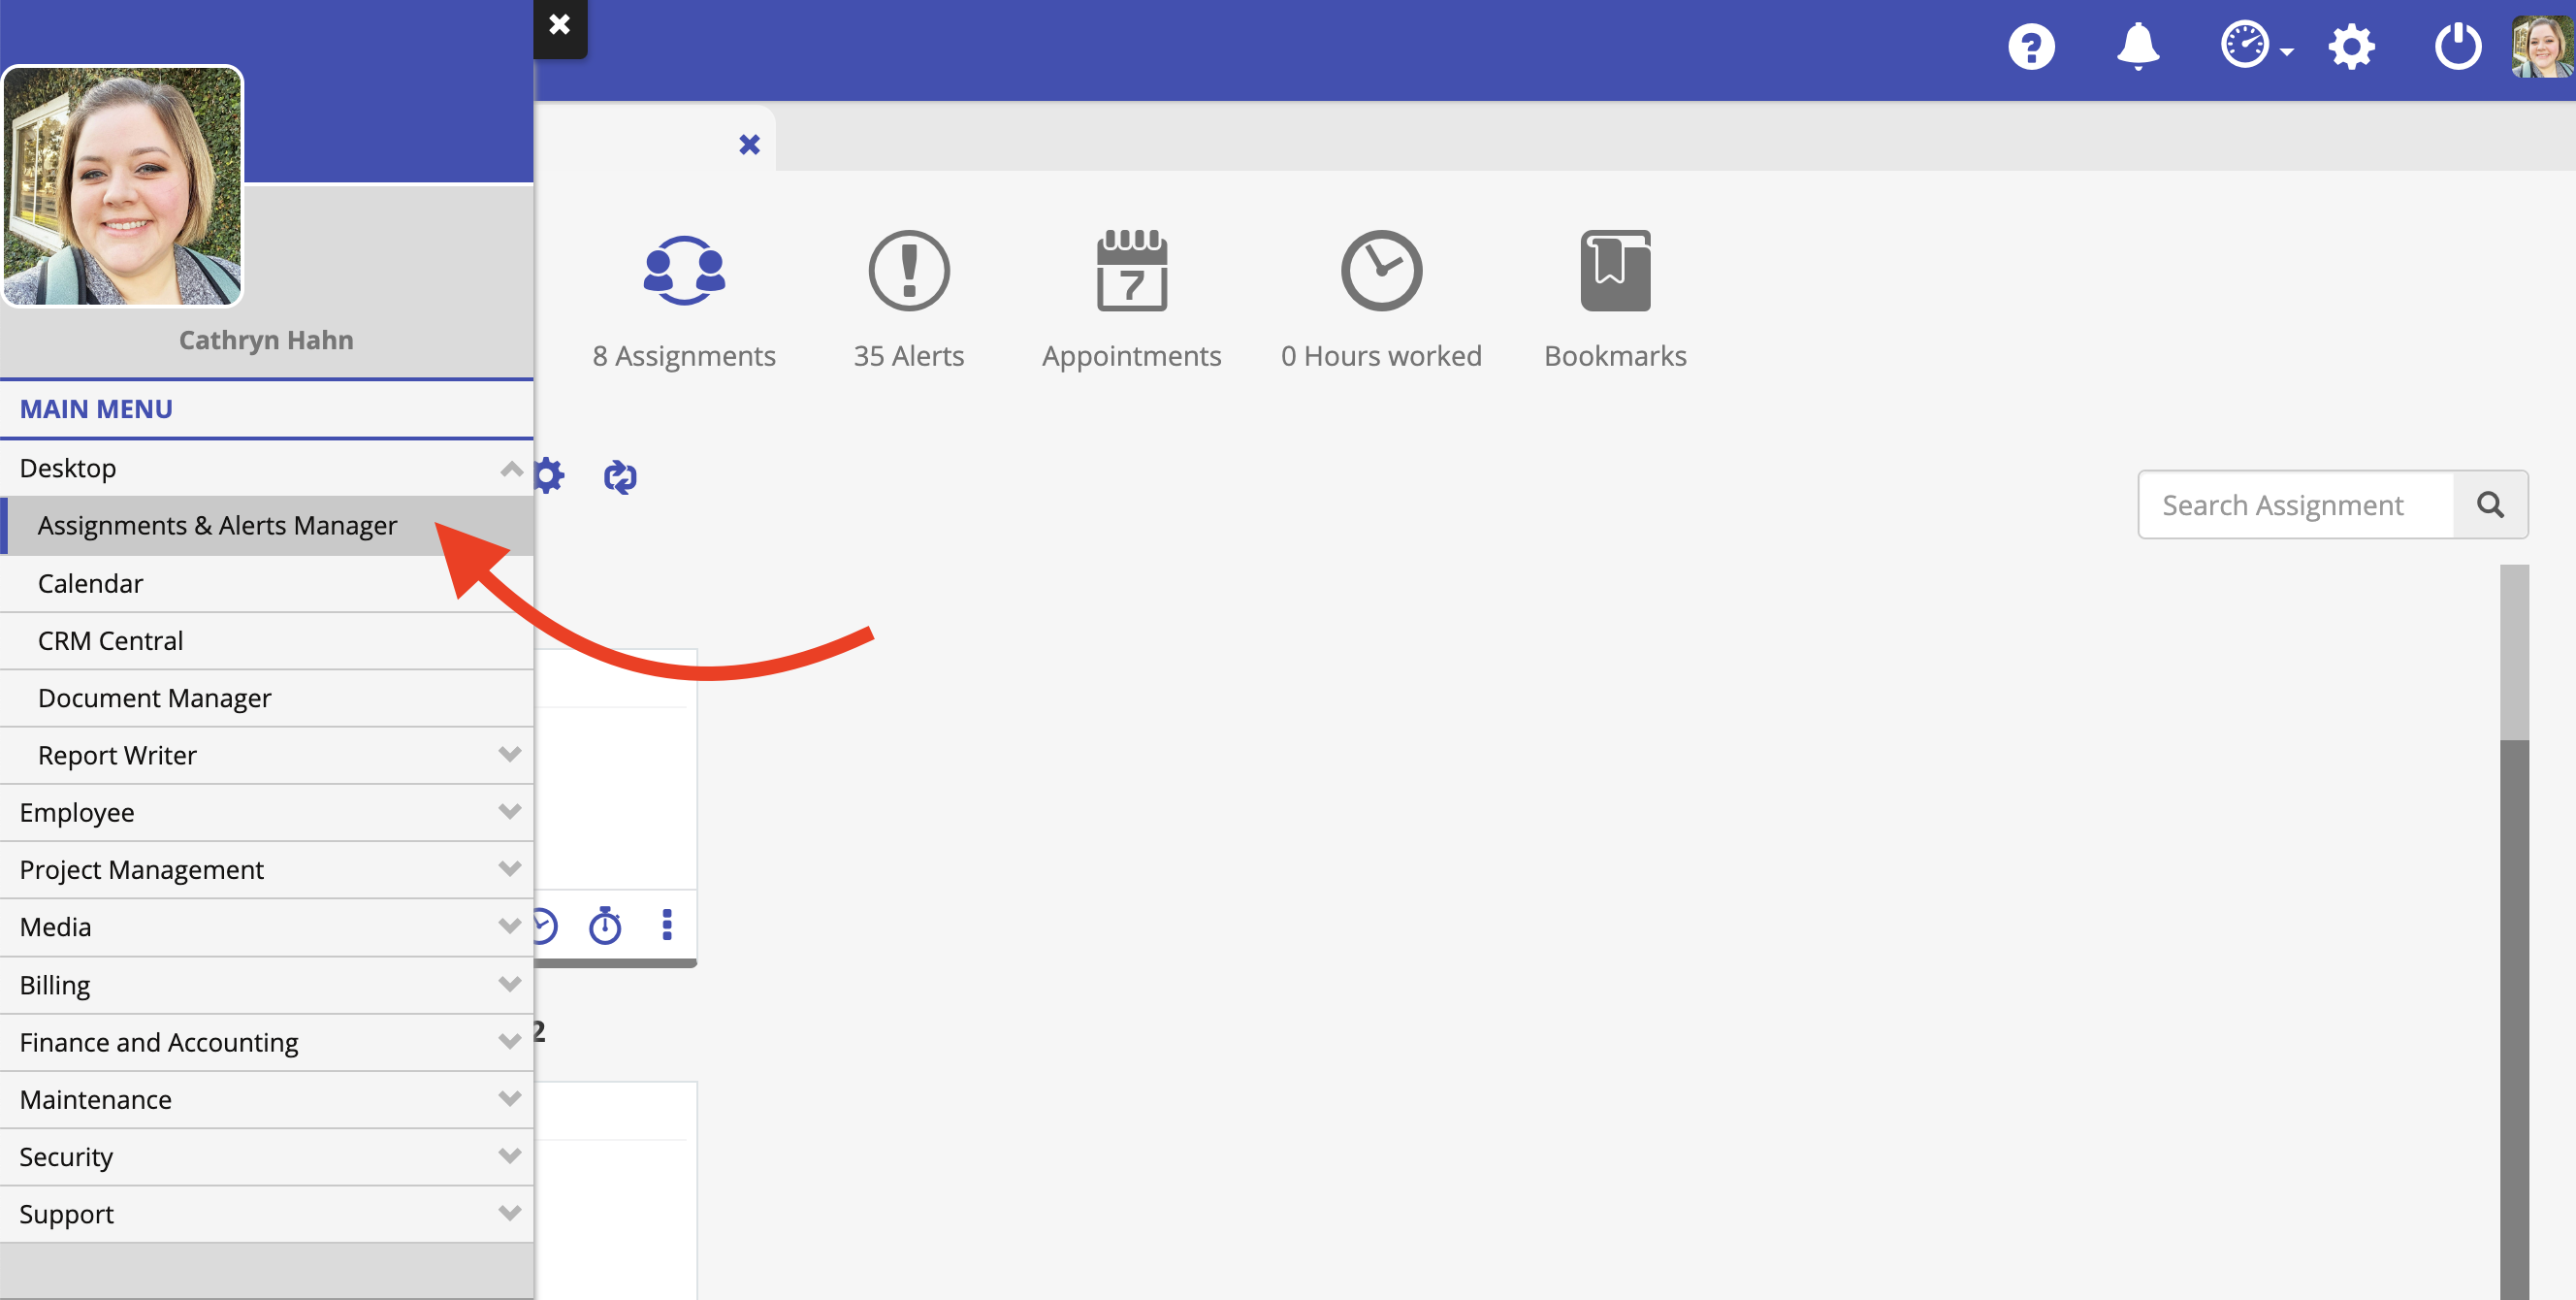
- From the desktop, click the hamburger menu > Desktop > Assignments & Alerts Manager.
- Make sure Task List View is selected on the dropdown menu, as well as the “My Assignments” button.
- Be sure to show only columns you need that are useful for you. Click the columns button on the left-hand side to hide/show columns so that you are left with a super relevant, concise view.
 We recommend only showing:
- Search
- Status
- Task Status
- task Flag
- Add Time
- Assigned to
- Subject
- Job
- Component
- Due Date
- Task Comments
- Hours
- Hide all others! You can also expand or condense the column width so that all of your columns fit inside one screen without showing a scroll bar.
- Click the words “Due Date” at the top of the due date category to sort your tasks in descending or ascending order. Click the funnel next to the words Due Date to filter tasks within a certain window of time.
Watch This Video to See This in Action: https://drive.google.com/file/d/11O_xcWPiRU1l0ao2jaaQpjh5SiMi0Xyi/view?usp=sharing
How To Fill Out Your Timesheet
The video below shows how to fill out your timesheet in Advantage.
Note:
- Timesheets are due on Mondays at 12 noon for the previous week.
- There are two ways to fill out your timesheet…
- Enter time on each job as you complete it.
- Or fill out your timesheet all at once at the end of the week. Below are the steps to do that.
https://drive.google.com/file/d/1QxtSFHoFcVpNlPzg17rr3_mV1219Girx/view?usp=sharing
Advantage FAQs
I’m trying to bill my time to a certain function, but don’t see it listed. What should I do?
- Everyone has specific functions assigned to them when their account is created.
Brand Connections
Tab {.tabset}
Overview
The Brand Connections pillar helps brands to authentically connect with their consumers using the right combination of paid, earned, shared and owned media paired with compelling creative to establish and maintain relevance while driving measurable business results.
This pillar contains three core disciplines.
- Paid Media – Lead by Chris Finnegan, VP, Director of Brand Connections
- Earned & Shared Media – Lead by Robert Baker, Director of Social Strategy
- Owned Media – Lead by Peter Cook, Director of Interactive Strategy
For more information about this pillar, see the slide deck below prepared by Chris Finnegan.
- https://docs.google.com/presentation/d/1ct3wqOVsXdZFMhRxksnnyF3FxZS4zX9CoYMJ45GzrOw/edit#slide=id.g1b084a43202_2_0
QR Code Creation with UTM’s
How to Create Shortened Links in Bitly with UTMs and Generate QR Codes
How to Create Shortened Links in Bitly with UTMs and Generate QR Codes
Objective: Learn how to create shortened links with UTMs (Urchin Tracking Modules) in Bitly and generate QR codes for tracking marketing campaigns. It’s important that we include UTM parameters in URLs and QR codes so that we can track the performance of our campaign in Google Analytics.
Step 1: Obtain UTM Parameters from Emily Domer
- Contact Emily for the correct UTM parameters for your marketing campaign. You will need to let her know the following:
- The campaign that the QR code is for (campaign)
- Where the QR code will be placed (source)
- **Note the “Campaign” and “Source” information that Emily sends, you’ll need them later.
Step 2: Log in to Bitly
- Use the agency’s Bitly account credentials (in Keeper) to log in to the Bitly website.
- If you do not have the credentials in Keeper reach out to Peter Cook or Jonathan Mclamb to request access.
Step 3: Click on “Create New”
- Once logged in, click on the “Create New” button in the top left corner.
Step 4: Select “Link”
- From the options, select “Link” even though we are creating a QR code. This will allow you to enter the provided UTM parameters.
Step 5: Enter Destination URL
- In the “Destination” field, paste the link you want to shorten.
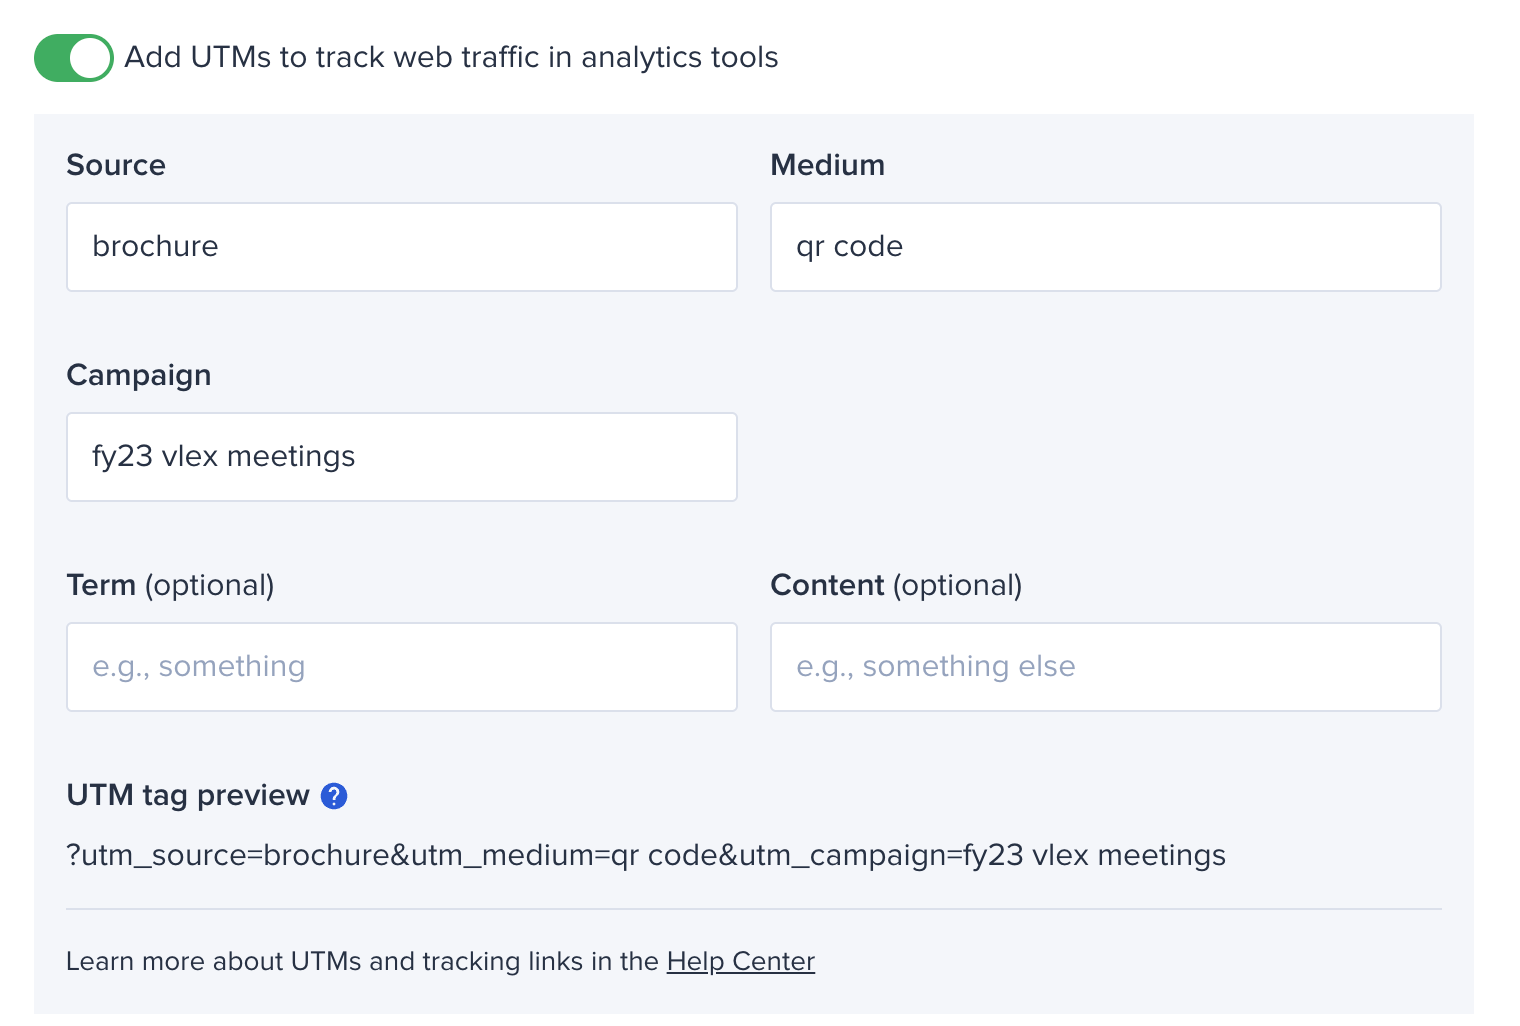
Step 6: Add UTMs
- Toggle the “Add UTMs to track web traffic in analytics tools” button on.
- In the “Campaign” and “Source” fields, add the values provided to you by Emily (The “Term” and “Content” fields will be rarely used).
- In the “Medium” field, enter “qr code”.
- **Make sure to use lowercase letters and to input values exactly as provided.
Step 7: Create Shortened Link
- Under the “Ways to Share” section, select bit.ly from the “Domain” drop down
Step 8: Generate QR Code
- Toggle on the QR Code slider.
- Preview and customize the appearance of the QR code.
- You can change the color of the QR code or add a client logo (.PNG file) to the center.
- Click “Create” in the bottom right corner.
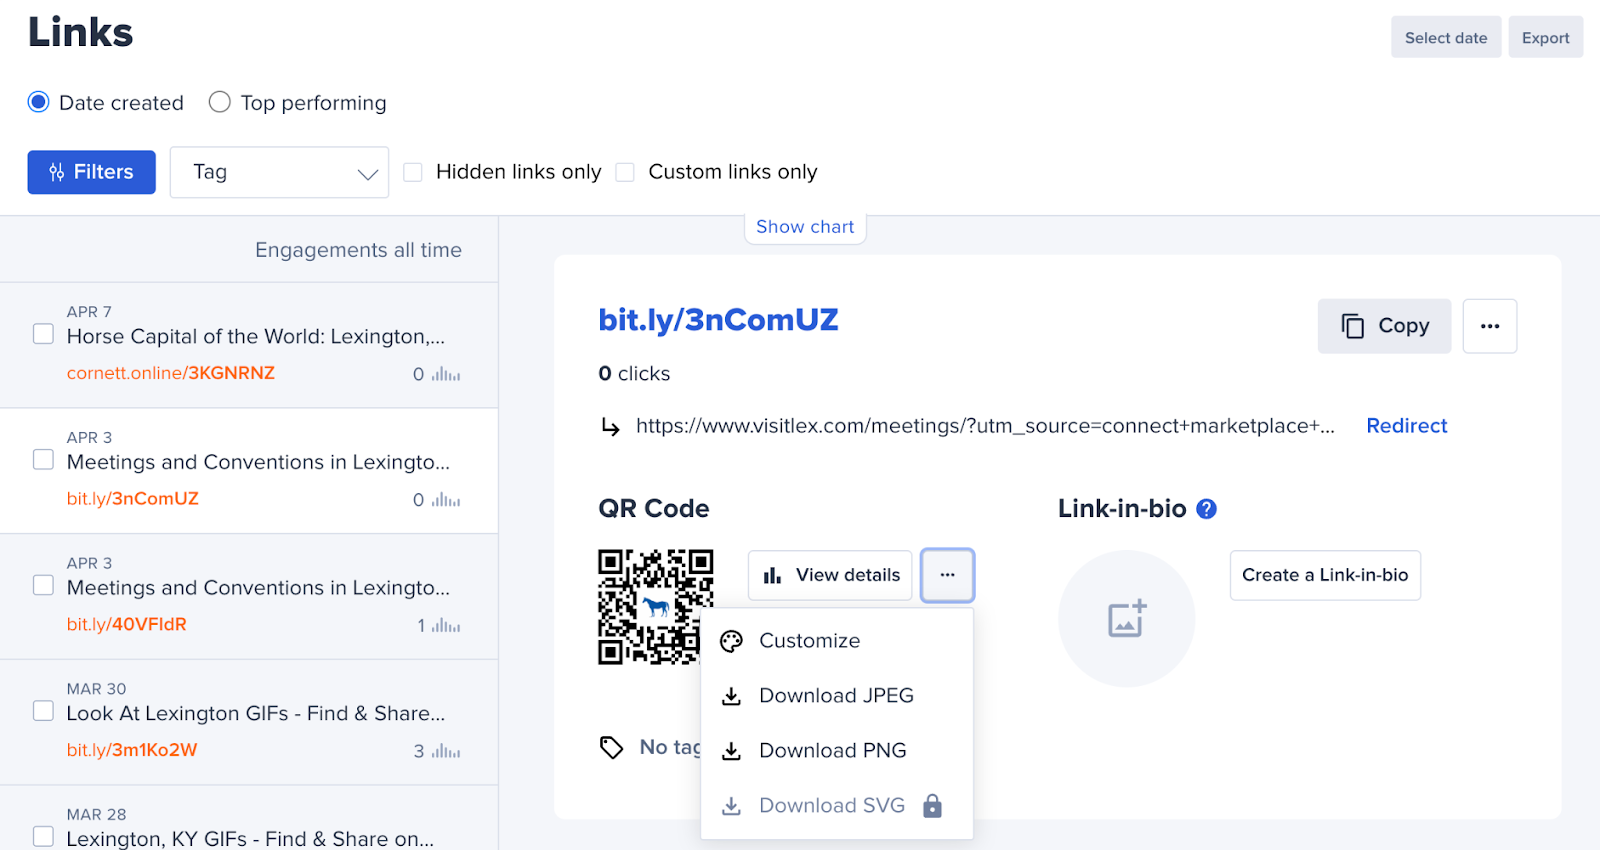
Step 9: Download QR Code
- On the next page, click on “…” under QR Code and then select a download option from the dropdown menu.
Overview
(Missing Content)
Content Studio
Content Studio Processes
(Missing Content)